
How Does a Gun Scope Work? Optics, Reticles, Parallax, and Zeroing Explained
Estimated reading time: 10 min
Summarize with AI
Share
Quick Answer
A gun scope works by using lenses to magnify a target and place an aiming reticle over the shooter’s field of view. The objective lens at the front transmits light and forms an image inside the scope. An internal erector system corrects the image orientation and, in variable-power scopes, changes magnification. The ocular lens at the rear presents the image and reticle to the shooter’s eye.
The scope does not guide the bullet or make the firearm inherently more accurate. It provides a more precise aiming reference. The shooter must adjust, or zero, the scope so the reticle corresponds with the firearm’s point of impact at a chosen distance.
- Objective lens: Transmits light into the scope and helps determine image brightness and exit-pupil size.
- Erector assembly: Corrects the image and controls magnification in a variable-power optic.
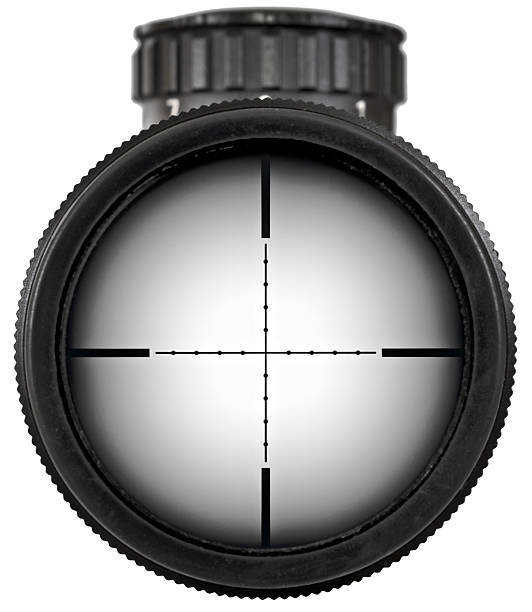
- Reticle: Supplies the crosshair, dot, holdover marks, or ranging references used to aim.
- Ocular lens and diopter: Present the image to the eye and allow the shooter to focus the reticle.
- Elevation turret: Adjusts the relationship between the reticle and point of impact vertically.
- Windage turret: makes the corresponding horizontal adjustment.
- Parallax adjustment: On equipped scopes, places the target image and reticle on the same optical plane to reduce apparent reticle movement.
Magnification labels describe the scope’s power and objective-lens diameter. A 3-9×40 scope offers adjustable magnification from three to nine power with a 40-millimeter objective lens. Higher magnification makes the target appear larger, but it generally narrows the field of view and makes natural movement more noticeable.
For reliable results, install the scope in compatible rings and bases, set safe eye relief, level the reticle, torque fasteners according to the manufacturers’ instructions, and confirm the zero with live ammunition. Ammunition, range, environmental conditions, shooting position, and changes to the mounting system can all affect point of impact. Always verify that a firearm is unloaded before mounting or adjusting an optic, and follow the ATF’s firearm safety guidance.
What a Gun Scope Actually Does
A riflescope combines a small telescope with an aiming reference. Compared with traditional iron sights, it places the target and reticle into one apparent sight picture. That can simplify precise aiming because the shooter does not have to visually align a rear sight, front sight, and target at different distances from the eye.
A scope cannot correct poor trigger control, an unstable position, inconsistent ammunition, or a loose mount. It also does not alter the bullet’s flight. Gravity begins affecting the projectile as soon as it leaves the barrel, while drag reduces velocity throughout the flight. The barrel is therefore angled slightly relative to the optical line of sight when a firearm is zeroed. The bullet’s curved trajectory and the straight line of sight coincide at the selected zero distance and may also cross at another distance, depending on sight height and trajectory.
Telescopic sights developed from the same basic principles used in telescopes. Modern scopes add durable sealed tubes, lens coatings, precise adjustment systems, and reticles designed for hunting, competition, defensive carbines, or long-range shooting. Gun owners can follow optical developments and policy issues through the latest firearms news from BT Gun Company.
How Light and Lenses Produce the Sight Picture
Light reflected from the target enters through the objective lens at the front of the scope. The objective assembly focuses that light into an image inside the optic. Because a basic objective lens forms an inverted image, the internal erector-lens system corrects its orientation before the image reaches the shooter.
In a variable-power scope, moving part of the erector system changes magnification. Turning the magnification ring mechanically repositions internal lenses. The ocular, or eyepiece, then presents the corrected image to the eye. A diopter adjustment near the eyepiece allows the shooter to make the reticle appear sharply focused for that shooter’s vision.
The diopter should normally be set while looking at a plain, bright background without aiming at the sun. The shooter should glance through the scope briefly, adjust, and look away between checks. Staring through the optic for an extended period lets the eye compensate for a poorly focused reticle, producing a misleading result.
Quality lens coatings can improve light transmission, reduce reflection, and protect exposed lens surfaces. Nevertheless, a scope does not create light. Image quality depends on lens design, coatings, objective size, magnification, exit pupil, ambient conditions, and the shooter’s eye.
Magnification, Objective Size, and Eye Relief
Scope markings summarize important optical characteristics. A fixed 4x scope provides four-power magnification. A 1-6×24 low-power variable optic, commonly called an LPVO, adjusts from one to six power and has a 24-millimeter objective. A traditional 3-9×40 hunting scope adjusts from three to nine power and uses a 40-millimeter objective.
Magnification indicates how large the target appears relative to the unaided view. More power can help with target identification and precise placement, but it also reduces field of view, exaggerates visible movement, and can slow target acquisition. A wide field of view at lower power is useful for close or moving targets, while higher power can help when firing from a stable position at smaller or more distant targets.
Exit pupil is the diameter of the beam of light leaving the eyepiece. It can be estimated by dividing objective diameter by magnification. A 40-millimeter objective at 5x produces an approximately 8-millimeter exit pupil; at 10x, it produces approximately 4 millimeters. This calculation does not measure overall optical quality, but it helps explain why the sight picture can become less forgiving at high magnification.
Eye relief is the distance behind the ocular lens at which the shooter can see the complete image. Correct eye relief is especially important on hard-recoiling rifles because positioning the scope too close can allow the eyepiece to strike the shooter. Mount the optic for a full sight picture in the shooting positions actually used, not only from a bench.
How Scope Reticles and Focal Planes Work
The reticle supplies the aiming reference. Designs range from uncomplicated duplex crosshairs to illuminated dots and graduated grids with elevation, wind, or ranging marks. A reticle’s markings are useful only when the shooter understands their angular values and confirms how they correspond with the firearm and ammunition.
In a first-focal-plane scope, the reticle appears to grow or shrink as magnification changes. Its angular subtensions remain consistent throughout the magnification range, allowing properly designed hold marks to retain the same value at every power.
In a second-focal-plane scope, the reticle appears to remain the same visual size while the target image changes. Graduated hold marks are generally accurate at a specified magnification, often identified by the manufacturer. Using those marks at another power changes the relationship between the marks and the target.
Illumination lights part or all of a compatible reticle; it does not usually project a visible beam onto the target. An illuminated riflescope remains an optical sight, and many models retain a visible etched reticle when illumination is switched off. Owners should consult the specific manual rather than assume every illuminated optic works identically.
How Windage, Elevation, MOA, and MRAD Adjustments Work
Windage and elevation turrets move the internal erector assembly relative to the scope tube. This changes where the reticle’s line of sight points in relation to the barrel, which changes point of impact at the target. On most scopes, turret arrows indicate the direction the bullet’s point of impact moves, but the owner should verify that convention in the manual.
Scope adjustments are commonly marked in minutes of angle or milliradians. One minute of angle, or MOA, equals approximately 1.047 inches at 100 yards and is often rounded to one inch for quick calculations. One milliradian, or MRAD, equals 3.6 inches at 100 yards or 10 centimeters at 100 meters. A 0.1-MRAD adjustment therefore corresponds to 0.36 inch at 100 yards or one centimeter at 100 meters.
To zero a scope, begin with the correct ammunition and a stable target at a safe range. Boresighting can help place initial shots on paper, but it is not a substitute for live-fire confirmation. Fire a careful group rather than adjusting from a single shot. Measure the group’s center relative to the aiming point, calculate the angular correction, adjust the turrets, and fire another group to verify the change.
For example, if a group center is two inches low at 100 yards, the required correction is approximately two MOA upward. The number of clicks depends on the scope’s stated adjustment value. Never assume that every turret uses quarter-MOA or 0.1-MRAD clicks.
Once zeroed, some shooters use reticle holds while others dial elevation or windage. Either method requires verified data. Published ballistic estimates are useful starting points, but actual velocity, bullet design, barrel length, atmospheric conditions, sight height, and ammunition consistency influence trajectory. Confirm data on the range rather than relying solely on an app or ammunition-box claim.
Parallax, Mounting, and Maintaining a Reliable Zero
Parallax is apparent movement between the reticle and target when the shooter moves an eye behind the scope. It occurs when the target image is not focused on the same optical plane as the reticle. At distances where parallax is present, inconsistent head position can shift the apparent aiming point even when the rifle remains still.
Some scopes have a side-focus or adjustable-objective control that reduces parallax at the target distance. Distance markings on these controls are references, not guaranteed measurements under every condition. Adjust while maintaining a stable firearm until the target is clear and the reticle shows minimal apparent movement as eye position changes. Reticle focus is set with the diopter; target focus and parallax are handled by the parallax control when one is provided.
Mechanical installation is equally important. Use bases and rings compatible with the firearm, scope-tube diameter, and intended mounting system. Ensure the optic does not contact the barrel, receiver, handguard, or another component in an unintended way. Level the rifle and reticle, maintain adequate ring spacing, and follow the ring, base, firearm, and scope manufacturers’ torque instructions. Excessive torque can damage parts, while insufficient torque can allow movement.
After mounting, confirm eye relief from realistic positions and cycle the firearm safely to check clearance. Recheck zero after transporting the rifle, removing the optic, changing mounts, experiencing an impact, or switching ammunition. Shooters preparing a new setup can browse firearms and compatible accessories through BT Gun Company.
Common Scope Mistakes and Practical FAQs
What are the most common setup mistakes?
Frequent errors include mounting the scope too high or too far rearward, failing to level the reticle, overtightening rings, using mismatched bases or tube diameters, and assuming boresighting equals zeroing. Other mistakes include focusing the target before setting the diopter, using second-focal-plane hold marks at the wrong magnification, and chasing individual bullet holes instead of adjusting from the center of a group.
Does a more powerful scope make a rifle more accurate?
No. Magnification can make precise aiming easier, but it does not improve the firearm’s mechanical accuracy. Too much magnification can narrow the field of view and magnify wobble or atmospheric distortion. The useful power range depends on target size, distance, shooting position, and purpose.
Why is the image black around the edges?
A dark crescent or restricted circular image usually means the eye is outside the scope’s usable eye box. Move the head slightly forward, backward, or laterally until the complete field of view appears. If a natural shooting position repeatedly produces shadow, the scope’s mounting position may need correction.
Why did the zero change?
Possible causes include loose fasteners, mount movement, a damaged optic, different ammunition, barrel-temperature changes, inconsistent shooting technique, or a shift in environmental conditions at distance. Inspect the equipment safely, verify torque against manufacturer instructions, and test with groups before assuming the scope has failed.
Can a scope be used on any firearm?
Only when the optic, mounting system, eye relief, recoil rating, and firearm are compatible. A conventional riflescope is not automatically suitable for every handgun, shotgun, airgun, or heavy-recoiling cartridge. Follow the optic and firearm manufacturers’ instructions and use mounts designed for the specific platform.
Ready to build or refine your scoped-firearm setup? Visit BT Gun Company to shop firearms, optics-ready platforms, ammunition, and shooting accessories from a licensed FFL dealer.

About the Author: Jeff Brown
Jeff Brown is CEO of Fuzzy Holdings LLC and owner of BT Gun Company, a Class 7 FFL dealer since 2023. An NRA-certified Range Safety Officer who has been shooting since 1983, he teaches hunter safety at his local gun club, hunts spring and fall turkey, and has a soft spot for revolvers.