
How to Mount a Scope Correctly: Step-by-Step Guide
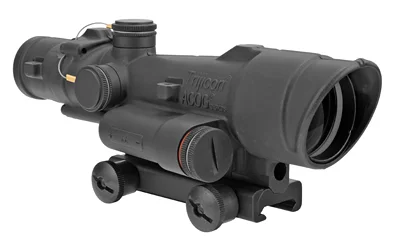
Quick Answer
To mount a scope correctly, start with a compatible base, rings, and scope tube. Read the firearm, mount, and optic manuals because torque values, screw locations, and installation sequences vary by manufacturer.
- Verify compatibility: Match the base to the firearm, the rings to the base interface, and the ring diameter to the scope tube.
- Check clearance: The objective bell, adjustment turrets, and eyepiece should clear the firearm and mounting hardware.
- Set position: Adjust eye relief according to the scope manufacturer’s guidance before fully tightening the rings.
- Level carefully: Align the reticle with a dependable reference rather than assuming the turret cap is level.
- Use specified torque: Tighten base and ring screws evenly with an appropriate torque driver, following every manufacturer value and sequence.
Treat every firearm as if it is loaded. Keep the muzzle pointed in a safe direction. Keep your finger off the trigger and outside the trigger guard until your sights are on the target and you have decided to shoot. Before cleaning or inspecting a firearm, unload it, remove the magazine, lock the action open, and visually and physically check that the chamber is empty.
Shop compatible Optics & Sights and review available Gun Parts before beginning the installation.
Choose Compatible Scope-Mounting Components
A secure installation begins with parts designed to work together. Determine whether the firearm accepts a direct-mounted base, separate bases, or a rail. Confirm the exact receiver pattern rather than selecting a base by appearance. Rings must match both the base interface and the scope’s specified tube diameter.
Ring height is another important decision. The scope needs enough clearance for its objective bell, eyepiece, turrets, and any attached accessories. Excessively tall rings may make a comfortable stock fit more difficult, while rings that are too low can allow the optic to contact the barrel, receiver, rail, or another component. Check actual manufacturer dimensions because similarly labeled ring heights can measure differently.
Inspect all parts before assembly. Screws should be the correct type and length for their intended locations. A screw that is too long may bottom out before securing the base, while one that is too short may not provide the engagement intended by the manufacturer. If the firearm requires drilling, tapping, permanent modification, or fitting that is not covered by its manual, consult a qualified gunsmith.
How to Mount a Scope Step by Step
- Read every applicable manual. Review the instructions for the firearm, base, rings, and scope. Identify required tools, torque specifications, screw locations, and any instructions concerning thread preparation or thread-locking compounds.
- Organize the correct tools. Use properly fitting bits and a calibrated torque driver that covers the manufacturer’s specified range. A padded vise or stable gun cradle can support the verified-empty firearm and help protect its finish. Useful setup items may be found under Accessories.
- Prepare the mounting surfaces. Inspect the receiver, base, rings, screws, and scope tube for debris or damage. Follow the manufacturer’s directions concerning dry, cleaned, lubricated, or treated threads because thread condition affects torque. Suitable supplies are available in Cleaning & Maintenance.
- Install the base or rail. Place each component in its specified orientation. Start screws by hand to reduce the chance of cross-threading, then tighten them in the stated sequence and to the listed torque. Use thread-locking compound only when the manufacturer calls for it.
- Fit the lower ring sections. Attach the rings to the base or rail according to their instructions, leaving enough adjustment for scope placement. Pay attention to directional markings, recoil lugs, crossbolts, and matched ring components when present.
- Place the scope in the rings. Set the optic into the lower ring sections without forcing the tube. Loosely install the upper ring sections so the scope can still move forward, backward, and rotationally.
- Set eye relief and scope position. Position the optic according to the scope maker’s eye-relief guidance and the firearm’s stock fit. Confirm that the intended viewing position provides a full field of view without requiring forced head placement. Also verify visual clearance around the objective, eyepiece, turrets, and firearm controls.
- Level the firearm and reticle. Use suitable leveling references for the firearm or mount, then align the reticle with a dependable vertical or horizontal reference. A removable turret cap is not always a reliable leveling surface unless the manufacturer identifies it as one.
- Tighten the ring screws evenly. Follow the specified pattern, bringing screws down gradually while monitoring reticle alignment and ring gaps. Apply only the manufacturer’s stated torque. Excess torque can damage the scope tube or internal components, while uneven tightening can rotate the optic.
- Complete a final inspection. Confirm that all fasteners received their correct torque, the scope has not shifted, ring gaps match the mount maker’s directions, and no component contacts an unintended surface. Record the torque settings for future reference.
Common Scope-Mounting Mistakes to Avoid
Do not assume one torque value applies to every screw. Base screws, ring crossbolts, and ring-cap screws may have different specifications. Generic internet values should not replace the instructions supplied with the actual components.
Other common problems include mismatched tube and ring diameters, incorrect base orientation, bottomed-out screws, insufficient objective clearance, and tightening one side of a ring cap completely before the other. Avoid using extra force to correct poor fit. Rings should not be lapped, modified, or bedded unless the component maker supports that procedure and the work is performed with the proper tools and knowledge.
Be sure of your target and what is beyond it. Any later zeroing or live-fire confirmation should follow current range rules, the optic and firearm manuals, and qualified instruction.
When to Recheck the Installation
Reinspect the mount after transport, maintenance, an impact, unexplained point-of-impact changes, or any removal and reinstallation. Look for movement marks, damaged screw heads, shifted ring gaps, contact points, or a rotated reticle. Check torque only as directed by the manufacturer; repeatedly tightening screws beyond specification can cause damage rather than prevent it.
If hardware repeatedly loosens or the scope will not remain aligned, stop treating torque as the only possible cause. Compatibility, damaged threads, an incorrect base, uneven receiver surfaces, or internal optic issues may require evaluation by the mount manufacturer, optic manufacturer, or a qualified gunsmith.
For a new optic, rings, bases, or related mounting equipment, browse the BT Gun Company selection of Optics & Sights and compare each product’s specifications with your firearm and intended setup.